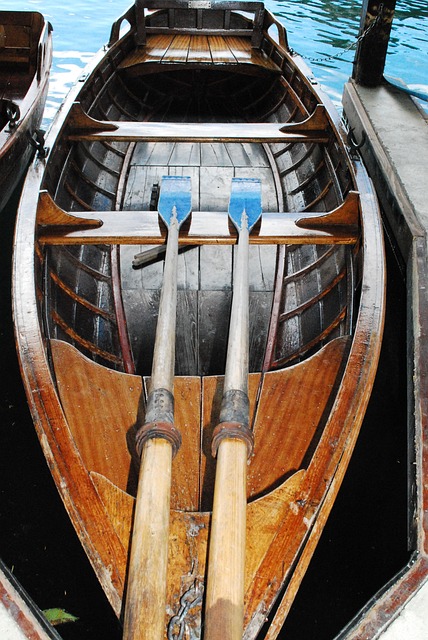


Paddling down tranquil rivers and serene lakes in a canoe offers an unmatched connection with nature. To enhance your canoeing experience, a well-designed canoe seat is essential. While many canoes come with basic seating, customizing your seat can greatly improve comfort and efficiency during long trips. In this article, we will guide you through the process of creating your own DIY canoe seat, complete with step-by-step instructions, and tips.
Materials You’ll Need
Before diving into the construction process, gather the necessary materials. You can find these items at hardware stores, outdoor supply shops, or online retailers. Here’s a list to get you started:
| Materials | Quantity |
|---|---|
| Marine-grade plywood | 1 sheet |
| Foam padding | 1 sheet |
| Vinyl fabric | 1 yard |
| Webbing straps | 2 sets |
| D-rings | 4 |
| Stainless steel screws | Assorted |
| Screwdriver | 1 |
| Measuring tape | 1 |
| Saw (circular or jigsaw) | 1 |
| Foam adhesive | 1 can |
| Sewing machine | 1 |
Step-by-Step Guide
Step 1: Measure and Design
To commence your journey towards an enhanced canoeing experience, take precise measurements of your canoe’s seating area. Capture the width, length, and unique contours. With these measurements as your foundation, artistically draft a seat design that harmonizes aesthetics and functionality, ensuring it aligns seamlessly with your canoe’s structure.
| Key Recommendations | |
|---|---|
| Measure | Accuracy is paramount; double-check all measurements before proceeding. |
| Design | Create a design that complements your canoe’s style and your comfort needs. |
Step 2: Cutting the Plywood
As your design takes shape, shift your focus to materializing it. Utilize a saw, be it circular or jigsaw, to cut marine-grade plywood according to your design’s specifications. Pay meticulous attention to detail during this phase. Once the cuts are complete, devote time to sanding the edges, fostering a polished and splinter-free finish.
| Key Recommendations | |
|---|---|
| Saw Selection | Choose a saw that suits your comfort level and precision needs. |
| Plywood Quality | Opt for marine-grade plywood for its durability against water exposure. |
Step 3: Padding Placement
Elevate your canoeing comfort with plush padding. Position foam padding over the plywood, outlining its shape meticulously. Trim the foam along the traced lines, mirroring the plywood’s dimensions. Secure the foam with adhesive, allowing sufficient drying time to guarantee a secure and comfortable foundation.
| Key Recommendations | |
|---|---|
| Adhesive Application | Apply the adhesive evenly for a strong and lasting bond. |
| Drying Time | Patience during drying ensures a solid connection between foam and plywood. |
Step 4: Upholstering
The aesthetics of your custom seat come to life in this step. Lay vinyl fabric flat and place the padded plywood atop it. Trace around the edges, leaving surplus fabric for wrapping. With precision, cut along the traced lines. Tuck and sew the edges meticulously, resulting in a refined and polished appearance.
| Key Recommendations | |
|---|---|
| Fabric Choice | Select vinyl fabric that aligns with your canoe’s theme and your preferences. |
| Sewing Technique | Neat sewing contributes to a professional and tailored finish. |
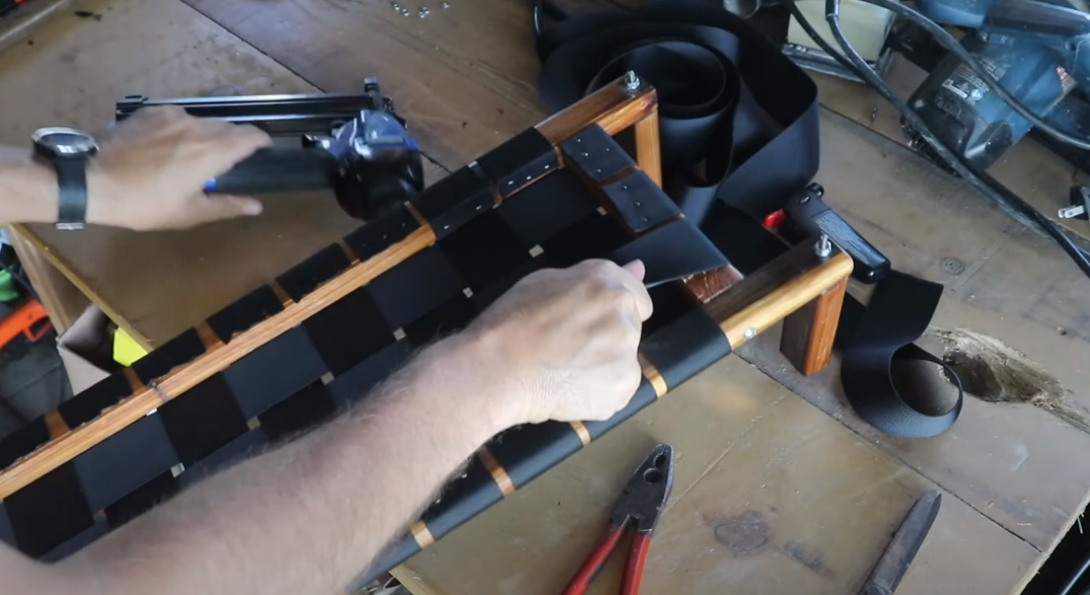
Step 5: Attaching Webbing Straps
Security is paramount. Measure the spacing between your canoe’s attachment points for the seat. Cut two sets of webbing straps to match this distance. Secure one end of each strap to D-rings using stainless steel screws. This choice guarantees durability in water-rich environments.
| Key Recommendations | |
|---|---|
| Stainless Steel | Opt for stainless steel screws to prevent rust and ensure longevity. |
| Precise Measurements | Accurate measurements of the straps ensure stability and balance. |
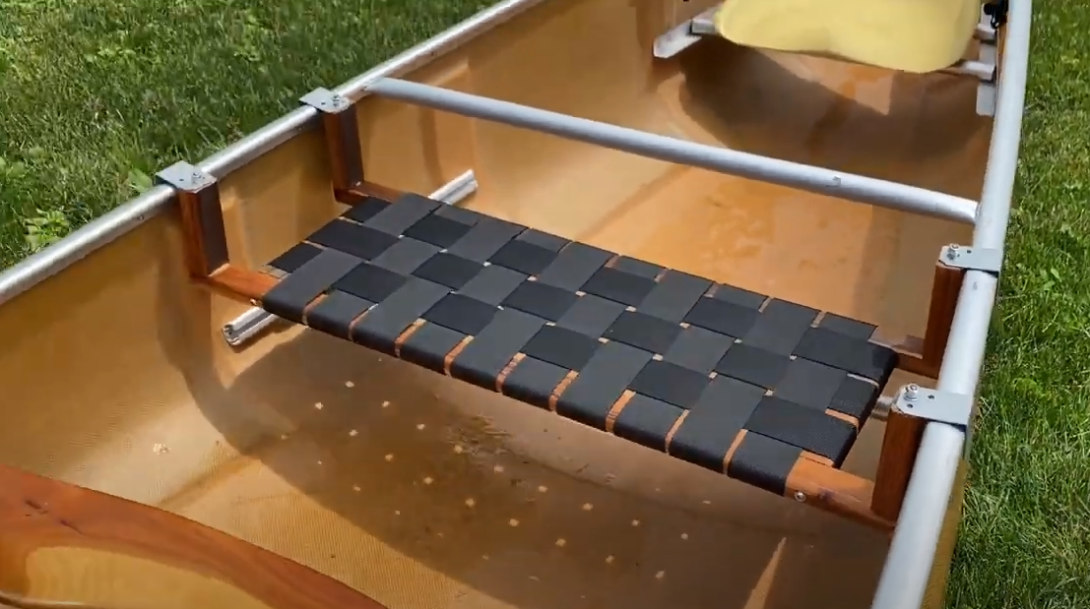
Step 6: Mounting the Seat
Witness your creation taking shape. Position the webbing straps beneath the canoe seat area. Align the D-rings with the canoe’s attachment points and secure the straps using the stainless steel screws. Adjust the strap tension to strike the perfect balance between comfort and stability.
| Key Recommendations | |
|---|---|
| Alignment Check | Confirm the alignment of the D-rings for a stable seat installation. |
| Comfort Focus | Adjust strap tension to create a seat that caters to your comfort preferences. |
Step 7: Final Adjustments
As you near completion, gently place the upholstered plywood onto the webbing straps. Ensure the seat is level and appropriately positioned. Fine-tune the strap tension, if necessary, to eliminate any potential shifting while paddling.
| Key Recommendations | |
|---|---|
| Quality Check | Conduct a final inspection to ensure your seat is ready for action. |
| Personalized Comfort | Make subtle adjustments to the strap tension to achieve optimal comfort. |
Tips for a Successful DIY Canoe Seat
1. Premium Materials
Embarking on a DIY canoe seat project requires meticulous material selection. To ensure your masterpiece stands the test of time, opt for marine-grade materials renowned for their durability and water resistance. Consider utilizing high-quality hardwoods or marine plywood for the seat’s frame, as they are known to withstand moisture and exposure to the elements. By choosing materials designed for aquatic environments, you’re laying the groundwork for a resilient seat that promises years of comfortable paddling.
2. Comfort Redefined
Crafting a canoe seat goes beyond mere aesthetics; it’s about creating a haven of comfort. Choose high-density foam padding to elevate your paddling experience. This material offers exceptional support by evenly distributing your weight while dampening the impact of rough waters. As you glide through serene lakes or navigate challenging rivers, your high-density foam padding will cradle you in comfort, making every stroke a pleasure.
3. Aesthetic Appeal
Engaging in a DIY canoe seat project also presents an opportunity to showcase your creative flair. Opt for a vinyl fabric that not only complements the aesthetic of your canoe but also boasts waterproof and UV-resistant properties. This choice ensures your seat remains impervious to rain, splashes, and sun exposure. With a wide array of textures and colors available, you can curate a seat that not only feels luxurious but also resists fading, ensuring your canoe remains as stunning as it is functional.
4. Precision and Craftsmanship
Attaching webbing straps is a pivotal step in crafting a comfortable and secure canoe seat. Precision is paramount here. Ensure the straps are evenly spaced to distribute your weight optimally, reducing pressure points during long journeys. Securely fasten the straps to the seat’s frame, using stainless steel or corrosion-resistant hardware. By investing time in this detail, you’re investing in your paddling comfort and stability.
5. The Art of Placement
Before securing your masterpiece onto your canoe, take a moment to assess the placement meticulously. Prevent unnecessary damage by ensuring the seat doesn’t interfere with your paddling motion or balance. Verify that it’s centered and aligned with the canoe’s design. By double-checking the placement, you’re safeguarding both your seat and your overall paddling experience.
6. Personalized Comfort
Why settle for ordinary when you can achieve extraordinary comfort? Consider going the extra mile by incorporating personalized features like additional padding or lumbar support. This touch transforms your canoe seat into a bespoke oasis, accommodating your unique physique and preferences. Whether you’re embarking on a day trip or an extended expedition, these thoughtful additions will make every moment on the water a pleasure.
Conclusion
Crafting your own canoe seat adds a personal touch to your outdoor adventures. With some basic tools, materials, and a bit of creativity, you can create a comfortable and functional seat that enhances your canoeing experience. So, gather your supplies and get ready to paddle in comfort and style!
For a step-by-step demonstration, check out this video:
FAQ
Yes, you can customize the materials based on your preferences. However, ensure they are suitable for outdoor use and provide adequate comfort.
Regularly wipe down the seat with a damp cloth to remove dirt and debris. Avoid using harsh chemicals that could damage the fabric. If the seat gets wet, allow it to air dry before storing.
The cost can vary depending on the quality of materials and tools you choose. On average, you can expect to spend around $50 to $100 for materials.
While the process is similar, kayak seats may have different attachment points and dimensions. Adjust the measurements and attachment methods accordingly.
Absolutely! This project is suitable for various skill levels. You can also find online tutorials and videos that provide visual guidance for better understanding.